Step-by-Step Guide: How to Register ERP and Add an Intermediary on the MyInvois Portal

Biztrak MSB E-Invoicing Training Schedule for May-Jun 2025
April 4, 2025
Step-by-Step Guide: How to Appoint a Representative on MyTax Portal
April 26, 2025
If your business uses an ERP system like Biztrak to generate and submit e-invoices, the ERP provider will act as your intermediary. In this case, your business can leverage the ERP provider’s digital certificate to submit e-invoices on your behalf—eliminating the need to use your own digital certificate.
To ensure a smooth and compliant process with Malaysia’s e-invoicing mandate, businesses are required to register their ERP system and appoint the ERP provider as an intermediary on the MyInvois Portal.
While it may sound technical, the process is simpler than you might expect—with the right guidance. In this step-by-step guide, we’ll walk you through how to register your ERP system and add your intermediary with ease. Let’s get your business e-Invoice ready—confidently and without hassle.
How to Register ERP on the MyInvois Portal?
Step 1: Log in to the MyTax website via https://mytax.hasil.gov.my/.
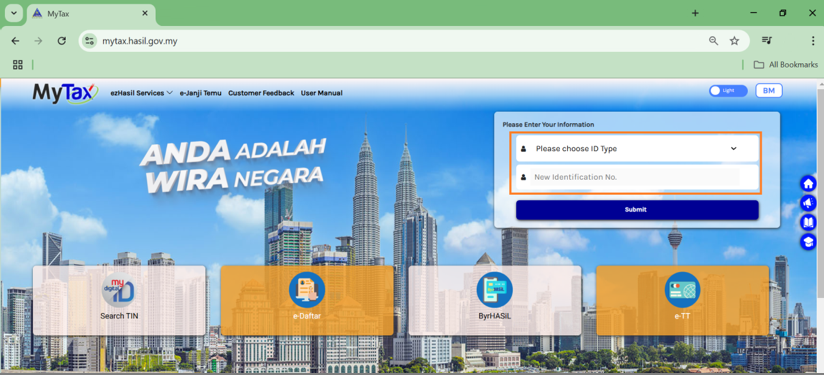
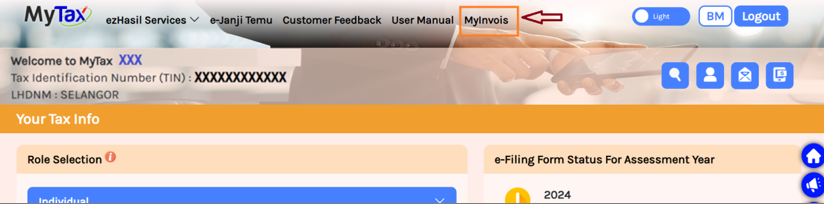
Step 2: Click on the “MyInvois” option to be redirected to the official portal at https://mytax.hasil.gov.my/.

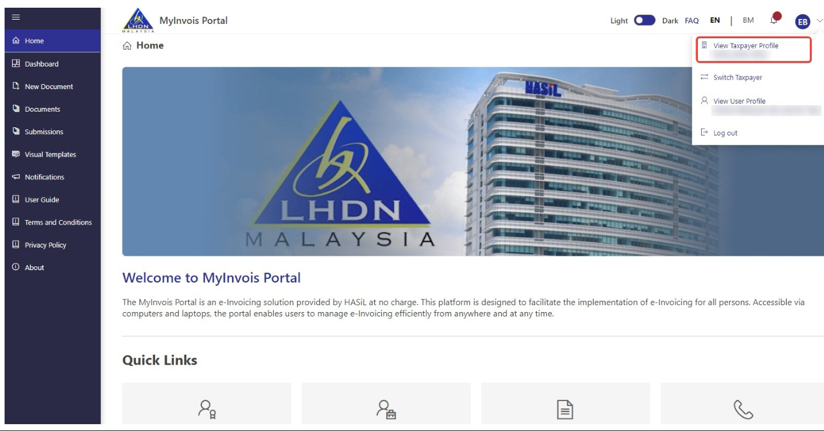
Step 3: At the top-right corner of the MyInvois Portal, click the profile dropdown menu and select “View Taxpayer Profile” to access the taxpayer's information.

Step 4: At the top-right corner of the MyInvois Portal, navigate to the ERP tab under “Representatives”, then click “Register ERP” to add a new System Representative.
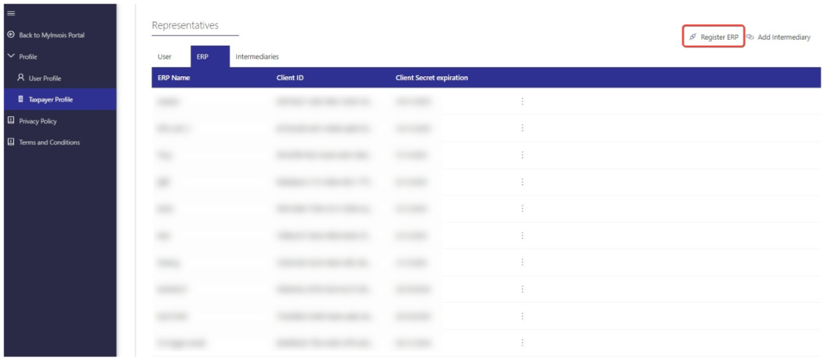
Step 5: Enter the required details and click “Register” to complete the process.

Step 6: Individually copy the Client ID, Secret 1, and Secret 2, and save them in a Word document for your reference. Then, enter these credentials into the Biztrak MSB application by navigating to Admin Menu > Company Information, provided that "Taxpayer" is selected as the e-Invoice login option.

How to add Intermediary on the MyInvois Portal?
Step 1: Log in to the MyTax website via https://mytax.hasil.gov.my/.
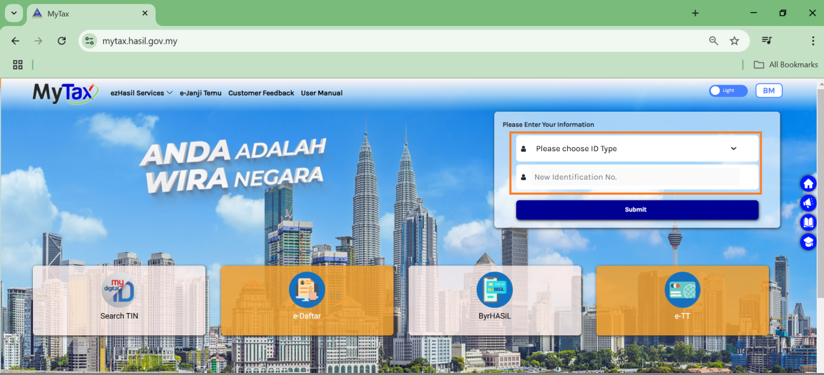
Step 2: Click on the “MyInvois” option to be redirected to the official portal at https://mytax.hasil.gov.my/.
Step 3: At the top-right corner of the MyInvois Portal, click the profile dropdown menu and select “View Taxpayer Profile” to access the taxpayer's information.
Step 4: Scroll down the Taxpayer Profile page and click on “Add Intermediary” under the Representatives section.

Step 5: Set the representation expiration date (a three-year period is recommended) and ensure all functions listed below are granted permission. Then, click the “Add Intermediary” button to complete the process.

Step 6: You will be redirected to the “Intermediaries” tab, where you can view the details of the newly added Intermediary.